However, they wanted a studio shoot. Errr...sure, I can swing that!
See, I don't own a studio. Last time I was in a real studio was probably 4 years ago before I even picked up a camera. I did take a course on the basics of a studio, but considering we were usually 4-6 people working in the same place for an hour, you don't really get THAT much hands on. But hey, it was a few years ago, things should still be fresh in mind, right? Right?!?
First stop, finding a studio.
These places can be damn expensive. I understand why, they are premium locations, equipment, rent and all that jazz to cover. I found a place that was well priced, came with some quality lights. I do have some speedlites (flashes) I can use remotely, but having some quality studio strobes to use makes a nice difference.
I booked the studio for 4 hours, from 6:30pm to 10:30pm. I asked the band to show up for 7:00pm, giving me at least 30 minutes to set things up and get things ready. While the band fully understood that I'm not a studio pro and are accepting of me playing with lights and such while I shoot, I still wanted to give them as professional an experience as I could.
My first impression when I got to the studio was that this place was small to shoot 5 people. It was a rectangular room, very clean and very nice, but the backdrops were placed on the long walls, not leaving much room to shoot. There wasn't an option to move them to the short wall to give me more shooting space.
One thing I wanted to do was shooting with a longer lens (I brought my 70-200 with me). When you have a longer focal length, the image will be a bit squished and tight. Compared to shooting with a wider lens where the image will be stretched. The reason for doing this is that you'll get all the members in the shot, on the background, and minimize what is around the backdrop. However, to shoot a group shot at 150mm, you need plenty of room, something I could not get in this place. No problem, we'll make due!
The widest I could shoot, with my back almost on the opposite wall, and get the whole band in the shot (not even full body) was about 30 mm, which is pretty wide. Trying to keep the sides of the backdrops out of the image was very challenging.
I didn't want to stick to my original plan of shooting long as I was not able to. I decided that if I can't shoot long, I'll just get up in their face with a wide angle lens and play with that. It turned out that this worked pretty well!
The image below is at 18 mm

Lights, camera, more lights!!
Now the thing that was really stressing me out was using the lights. One of the most critical things in photography is being able to control and understand the light and the shadows. Where they are placed, what they are drawing attention to.
I have shot with a flash on camera, I have bounced that light off ceilings and walls to create shadows, but now I actually had 3 lights to play with and place where I wanted to, at the power I want to. Things like the inverse square law (the amount of light that drops off when you move a flash away), lighting ratios (main light power vs. fill light power vs. hair light power vs. background light power), and then the position of all the lights are all things you need to keep in mind.
So I started with simple things. Make sure I get the images I need to get to make them happy. Then start playing around.
I toyed with the standard main light on one side, 45 degrees up and a fill light closer to me, lower down, at a lower power setting. It seemed to work pretty well. I kept looking for odd or big shadows showing up on the band’s faces. If they were too big, I turned the light, adjusted settings, whatever I felt worked.
I tried some more cross lighting (not even sure if that’s what it’s called haha), with 2 lights, almost equal power, both 45 degrees up at opposite ends.
I even tried some side lighting, where one light to one side of the subject, causing a harsher shadow on their face.
Mistakes... I’ve made a few...
I thought I’d show some of the mistakes I made. Nothing really huge (you will never see those mouhaha), but some things to watch out for.
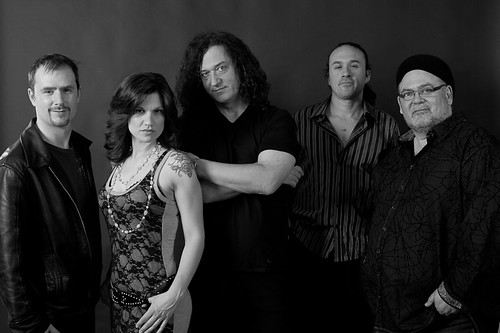
I really like this image for its composition. It works well; the band has a nice vibe going. Some were wearing black clothing and the background was black. So I knew that I needed to shine a light on their back that would cause a bit of a rim of light to separate them from the background. That was my intent. Being in such a small space, I didn’t have room for a proper light on a boom, so I had one positioned to the side pointing at their back. It gave me the effect on one side, not much on the other.
Another issue with this is that the light is too close to the guy on camera left, so his head is much brighter. Inverse square law might help this... I could move the flash back to control the light drop off and make it more even across all the members. Would probably need to adjust things a bit to get more power.
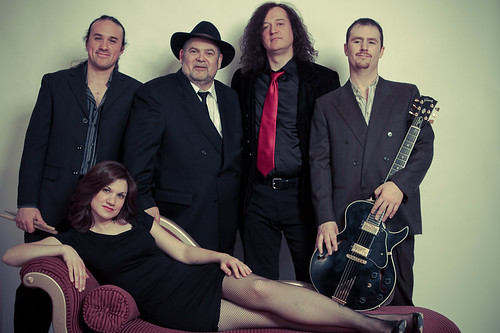
Plenty of issues in this image. We tried to use the chaise in the image as a prop. Great idea, but I was already challenged for room. Having the prop in with the band in back has them pretty much up against the seamless backdrop.
The lights caused some shadows on the wall behind some of the band members. I tried to compensate for this in processing by putting some vignette in the corners, which are like the shadows. A few other mistakes are cutting off the drummers stick (minor, but still sticks out to me) as well as the singer’s feet. But notice how the tall singer’s (yep, two singers) head is at the top of the frame. If I wanted to save her feet, I’d cut off his head. Decisions decisions.
Recap
All in all, it was a great shoot. I learned a lot and still managed to output a good number of images for the band.
Things I learned:
• Keep it simple. Don’t go over complicated. Simple lights, simple poses. When you get comfortable, and once the model is warmed up, then fancy things up. Getting standard shots is not too complicated, but if you want to grow, try things out, even if they don’t work!
• When shooting multiple people, watch for shadows that one person casts on the person standing behind him
• Give yourself prep time
• Remember that how you are behind the lens will project to the model(s). If you are stressed and annoyed, they will feel that. Not saying you need to be all happy happy joy joy, but just keep it in mind.
• Make sure the models are rested and happy. Take breaks. I totally forgot to bring refreshments and what not; thankfully a band member brought some. Radio is always nice, water, food (nothing messy).
• Know your space ahead of time, it will help minimize the surprises.
• Keep the subjects far from the background. I couldn’t do that as much and the background was visible. I figure I could of shot at a wider aperture for more depth of field...
• Plan on not having a plan. Direction is good, but sometimes, let the models lead the shoot. I got some great shots when a model was “into the zone” and just having fun.
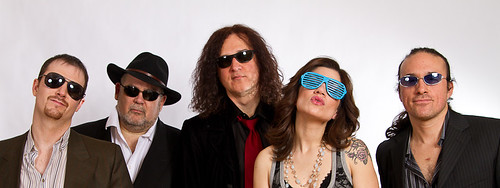
• Know the output the client wants. I was told that they want shots for a demo CD they are making and also some shots for the website. You’ll see below a few shots that I sent them to give them an idea of web ready shots: one is a banner style shot and another has room for text and the drummer pointing in a direction.
Here are some of my favourite images from the day. Note that these only have minor processing on them; still have some clean up to do in Photoshop.
Hopefully this wasn’t too long of a read, but I just felt like sharing.
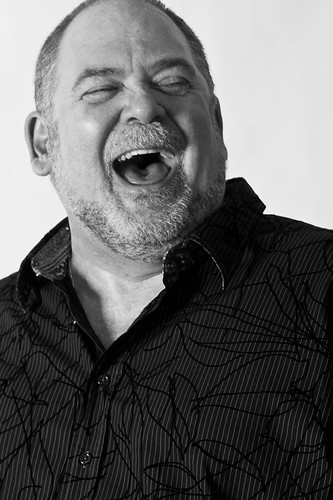
This was playing with a wider angle and lower down (almost lying down on the ground). We were between shots, the band was chilling, and he was playing with his guitar.

Here are the two shots I did for more web ready images


One last thing to remember is to always have fun and make sure your models are having fun as well. You'll get some great shots out of it